Showing posts with label Hero Arts. Show all posts

Tuesday, May 3, 2016

Stamp set sale!

I have many sets for sale as I'm trying to do a destash of my massive collection ... many sets are from the vault, meaning that they are no longer readily available and the price has jumped.

Just leave a comment with your email address and I will get back to you.

Prices in brackets are the original price.
See shipping and payment below list.

Papertrey Stamps and dies:
Background Basics: Vines – stamp set ($30 from the vault) --> $15 lowered to $12
Background Basics: Geometrics ($30 from the vault) --> $15 lowered to $12
Embellishments Coordinating dies ($8) --> $4
Stitches and Swirls - stamp set ($48 from the vault) --> $24
Bloomers stamp set and dies $20
Christmas Pointsettia dies ($8) > $5
Modern Basics stamp set ($48 from the vault) > $24
Damask Designs stamp set ($48 from the vault) > $24
Background Basics: Wrought Iron[/b] ($36 from the valut) > $24
Everyday Button Bits - images only - stamps $10


From other companies:
Hero Arts – Friends $5
Tim Holtz - Flights of Fancy $8

Shipping available to Canada, US and International based on weight:
One sheet (Canada $1, US $2, International $3.50)
Two sheets (Canada $1.50, US $3, International $6)
Payment via Paypal.
All sets have minimal staining, if any, come with labels and are from a smoke free, pet free home. :)

Saturday, August 31, 2013

Baby shaker card

My little niece was born last week and her name was announced yesterday - Clarissa Elyse.  Isn't that gorgeous?  I wanted to make a card to welcome her into the world so decided to make a shaker card.  I punched some hearts using Lawn Fawn and Studio Calico patterned papers and added some iridescent sequins and sparkly vanilla ones. 
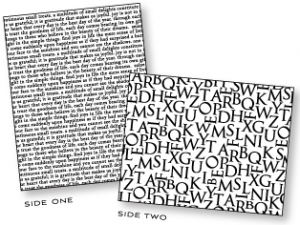
I cut a die cut using PTI's Fabulous Frames and heat embossed it with Versamark and  Zing embossing powder using the Hero Arts Alphabet pattern cling stamp.  The banner is PTI's Bountiful Banners and I used a Lawn Fawn alphabet stamp for her name.

While I had her name on the clear block, I stamped it on a few spare die cuts I already had - a Fillable Frames from PTI and a Kraft tag from Michaels.
Supplies:
Paper: LCI woodgrain, PTI Hawaiian Shores, Lawn Fawn and Studio Calico patterned paper
Stamps: Hero Arts Alphabet pattern cling stamp, Lawn Fawn alpha
Ink:  Versamark, Memento Nautical Blue
Misc: Zing embossing powder, PTI Bountiful Banners die, PTI Fabulous Frames die, heart punch, sequins 

Thursday, August 29, 2013

Enjoy your day

I created a card for a fellow crafter and since she wanted to know how it was done, I will share the process.  I took a piece of black card stock and cut it using my Big Kick and this full card triangle die:
I adhered it to a white card base using Tombo Mono Multi glue which has a thin tip and works well for this sort of application.  I stamped the sentiment and feathers using Hero Arts Tide Pool ink and VersaMagic Aquatic Splash before impressing it with one of my favourite impression plates to add texture - the Papertrey Book Print impression plate:

If you click on the picture below to enlarge it, you can see the texture it adds:
I used an exacto knife to cut out one row to make space for the sentiment.

Thanks for the interest in how to make it! :-) Hope that answers any questions you might have ...

Supplies:
Paper: Staples 110lb white, Papertrey Black
Ink: Hero Arts mid tone Tide Pool, VersaMagic Aquatic Splash 
Stamps: Studio Calico Love This
Misc: Papertrey Book Print impression plate, Simon Says Stamp full card triangle die, Tombo Mono Multi glue

The tags are Project Life grid cards using the same stamp set above and Papertrey's To You From Me set.  I have some of the journalling cards for sale here as well as stamps and an impression plate:
 my sale page here


Tuesday, July 30, 2013

Ink comparisons

I thought it might be helpful for an ink comparison of some of the darker more neutral colours.  I used my dye and pigment inks to give you an idea of their coverage and their hues.

You can see the difference between Memento's Tuxedo Black ink and Versafine Black Onyx, for example.  Versafine is a much richer more opaque ink that really coats the stamp giving good coverage.
Some are VERY different in colour - for example, even though Hero Arts mid tone wet cement would seem to be a gray/grey tone, it is more of a browney or taupey gray/grey if that makes sense. 
You can see how saturated the colour of the camera is in this picture - if I had used Tuxedo Black, it would've been splotchy but Versafine Black Onyx worked perfectly!

So what are your go to neutral inks?  Do you prefer dye inks or pigment?

Supplies:
Inks: Hero Arts mid tone; Versafine; Memento

Saturday, July 27, 2013

Runway Inspired RIC#40: Stella McCartney

This colour combo is so not my usual so I thought it was perfect to challenge myself. 

I pressed some Studio Calico Hearts and Arrows wood veneers into ink - Fresh red currant and mango and since I didn't have a bright enough yellow, used some dollar store pearlescent paint.  I added some Rock Candy Stickles for a little shine.
I made a little mistake on the sentiment - I meant to stamp the U in Hero Arts mid tone wet cement and then layer the rest in Versafine Black Onyx over top but stamped the U in black first so reworked the whole thing a bit.  Oops!  To get the gray part all in one line, I covered some of the words with washi tape before stamping into the ink pad and then removing it to stamp on the card.  This is another way of masking sentiments.  (The sentiment is configured in a stacked row so I had to get creative unless I wanted to cut it apart ...)

Supplies:
Paper: Staples 110lb white
Stamps: PTI Live Love Life
Supplies: Versafine Black Onyx; Fresh red currant, mango; Hero Arts mid tone wet cement
Misc: Studio Calico Hearts and Arrows wood veneers, dollar store yellow paint, Glossy Accents

------

My next card also features Live Love Life from PTI's uber talented Maile Belles:
I stamped the sentiment repeatedly using Hero Arts mid tone wet cement and Versafine Black Onyx before adding the hearts in red currant, mango and harvest Fresh inks.
Supplies:
Paper: Staples 110lb white
Stamps: PTI Live Love Life
Ink: Hero Arts mid tone wet cement, Versafine Black Onyx, Fresh red currant, mango and harvest 

Thanks to RIC for the colour challenge!  Happy hopping to you all!  Oh, and if you are looking for some crafty supplies, check out my sale page here to see if anything catches your eye.  I've got grid journalling cards, an impression plate and some stamps!

Wednesday, July 24, 2013

Festive Friday 13 - silver, pink and white

Well, the talented ladies over at Festive Friday have created some gorgeous cards with this new colour challenge combo:
Isn't that a pretty combination of colours?  Well, I made some more holiday cards to add to my stash.  Without further ado, here they are:
Well, the talented ladies over at Festive Friday have created some gorgeous cards with this new colour challenge combo:
Isn't that a pretty combination of colours?  Well, I made some more holiday cards to add to my stash.  Without further ado, here they are:
I used Holiday Lights from PTI with some Fresh sugar ink and silver embossing powder.  Ah, the joys of heat embossing - so simple and yet so effective!

Here's a close up of the embossing magic:
For my next one, I inked up Hero Arts Cling Dots with Fresh sugar ink and then layered it with a piece of grid card stock from Papertrey. 
I just got this paper pad and love it!  I have a thing for grids and graph paper so this fits the bill quite perfectly!
For my next one, I used some Blush Zing embossing powder which actually looks a little more pale peach than pink but I went with it!  I used a WMS set that a friend gave me for the ornament and then heat embossed in silver embossing powder for the sentiment from PTI's Bountiful Banners.
Very simple and CAS but perfect to mail since it is nice and flat.  Always good since so many stamps are used for holiday cards already ... plus my digital scale has decided to stop working so I can't weigh my envelopes anymore ... will have to invest in a new one. :-(
My next one uses a set that I just got - PTI's Round Repeats.  I simply love these medallions and they are so easy to stamp and line up!
A closeup of the embossing of the WMS sentiment and the layered medallion - LOVE this!!  I will have to try it with a rainbow colour combo next.
I made a tag to go with the card using aluminum tape and a SSS border die for the edge.  I used From Me To You for the to and from and then one of the sentiments in the WMS set with some sugar on the edges of the tag.

Well, that's it!  Thanks for the inspiration, Meredith and crew!  You girls rock!
-----
Check out my sale page here for some crafty items I have on sale now ... if you need some new supplies, see if any of my items interest you.
-----
Supplies: 


Paper: Staples 110lb white
Stamps: PTI Holiday Lights
Ink: Fresh sugar,  Versamark
 
Paper: Staples 110lb white, PTI patterned paper (sweet blush)
Stamps: PTI Holiday Lights, Hero Arts Cling Dots
Ink: Fresh sugar,  Versamark
Misc: Zing embossing powder (silver)
Paper: Staples 110lb white
Stamps: PTI Bountiful Banners, WMS 2011 Holiday Ornaments
Ink: Versamark
Misc: Zing embossing powder (silver, blush)
 
Card supplies
Paper: Staples 110lb white
Stamps: PTI Round Repeats, WMS 2011 Holiday Ornaments
Ink: Fresh sugar, Versamark
Misc: Zing embossing powder (silver)

Tag supplies
Paper: Staples 110lb white
Stamps: PTI From me to you, WMS 2011 Holiday Ornaments
Ink: Fresh sugar, Versafine Black Onyx
Misc: aluminum tape, SSS hexagon border die, WRMK corner chomper

Tuesday, June 25, 2013

Papertrey June Blog Hop: Grad 2013

Continuing on with the gold theme for this month's blog hop:

I kept this one simple and stamped Hero Arts Cling Dots with Brilliance Galaxy Gold for a little shimmer.
I added gold shimmer cardstock die cuts using PTI's Headline Alphabet and Movers and Shakers numbers for the grad year with some Vintage Cream ink.

Here's a closeup and you can see the slight shadow stamping of the numbers after I double stamped ...
Do any any of you crafters struggle with adhering small die cuts without the adhesive showing?  Foam tape or dots are usually white so they totally show.  I found the perfect solution - these clear glue squares.  I cut them up and they are pretty much invisible!  I bought a few extra packs, so if anyone would like one, I am going to sell them for $2.50 each, $3 with shipping.  Just leave a comment with your address if you are interested.  Gotta share finding something that really works! :)

Supplies:
Paper: Recollections gold shimmer card stock, PTI Smokey Shadow
Stamps: Hero Arts Cling Dots, PTI Movers and Shakers (numbers)
Ink: Brilliance Galaxy Gold, PTI Vintage Cream
Misc: PTI Headline alphabet dies , clear glue squares

Tuesday, April 30, 2013

His and Hers online class: Day Two - make a wish

For this card, I took inspiration from Jennifer McGuire's stamping technique with white ink and die inks.  What great ideas she has!
 I took a petal stamp from Maile's Modern Basics set and layered Vintage Cream (PTI) with Hero Arts mid tone inks.
For the mid tone inks, I used red royal, charcoal, cup o' joe, wet cement and tide pool.  I layered the smaller petals in die inks and then smallest polka dots in Vintage Cream.
I added the sentiment using Fresh ink in chocolate and then added platinum Liquid Pearls for a little bling.
I really like the idea for this card and will be trying it again - the look of white and light inks always looks so cool on dark card stock!  And the layering reminds me of velveteen stamping which I have always loved.  I tried it here and here ...

Supplies:
Paper: PTI Kraft
Ink: Hero Arts mid tone inks - tide pool, red royal, cup o' joe, wet cement; PTI Vintage Cream; Fresh chocolate
Stamps: PTI Modern Basics, Think Big
Misc: Platinum Liquid Pearls 

Monday, April 29, 2013

His and Hers Online Class - Day One: I just love you

 
This card is a thinking of you/love you sort of a card.  I kept it really simple and stamped the Hero Arts Tweed Pattern background stamp in Versamark for a subtle but simple background.  I added a negative die cut of the banner from Papertrey's Fabulous Frames.  I die cut three vellum notched flowers and added a dark turquoise enamel dot to the centre - it works great to hide the adhesive! :)
Next I tried something I've never done before - I stamped the banner in Versamark and then added the sentiment in PTI Vintage Cream which is a die ink.  Decided to try a little experiment ...
I thought that if I was lucky, I would be able to heat emboss with clear embossing powder and both would show up .... well, I was glad I tried it since it worked!
The cream sentiment is quite vibrant in person - I will definitely be doing this again!!

Supplies:
Paper: PTI Ocean Tides, Gartner's vellum
Stamps: PTI Fabulous Frames, Hero Arts Tweed Pattern background stamp
Ink: Versamark,
PTI Vintage Cream 
Misc: MME enamel dot, PTI notched flower dies, Fabulous Frames banner die

I have never done one before, but decided to make a mini album for Mother's Day - I had a bunch of photos printed in colour onto white paper and black and white on vellum.  Here's a sneap peek of page one:


Thursday, January 31, 2013

Clean and Simple: Day 2 - thank you

Another day of the fabulous card making class, Clean and Simple II:
Not sure but this might be more day one than day two but oh well ... I did some masking with an Angled Labels mask I made from acetate and a PTI die. I sponged some Colorbox Robin's Egg ink and then layered Hero Arts Studio Calico lattice background stamp with some Fresh ink in Steel Blue.  I stamped an arrow from Studio Calico Snap On's stamp set with Hero Arts' Cup o' Joe ink - what awesome coverage these mid tone inks have!!  Now that I have some, I see what all the fuss was about. :)

I added the sentiment from  Fabulous by Technique Tuesday using the nice and opaque Versafine Black Onyx. For a final touch, I decided to add some texture using PTI's Linen impression plate.  This is a great stand by!


So have you tried any masking?  How has it gone for you?

Paper: Staples 110lb white
Stamps:  Studio Calico Snap OnFabulous by Technique TuesdayHero Arts Studio Calico lattice background
Inks: Versafine Black OnyxHero Arts' Cup o' Joe, Colorbox Robin's Egg, Fresh ink - Steel Blue
Misc: acetate, PTI Angled Labels die, PTI Linen impression plate

Wednesday, January 30, 2013

Clean and Simple - Day 1: Keep Calm


I am loving the Clean and Simple Card Making II workshop and used one of the sketches and videos to inspire me.
So it might be a little known fact, but I am not a great (ink) mister - I have tried but have never been very good at it.  But I decided to give it a go again, try it and just let what happens happen.  So I spritzed some Studio Calico Mister Huey's Heirloom Blue and then Studio Calico Mister Huey's Shine over top.  I used a Studio Calico Chevron mask which has a fun graphic look to it.
I then cut out a circle with my Martha Stewart circle cutter and added a sentiment that I (gasp!) did some stamp surgery on.  I stamped 'keep calm and ... on' in Hero Arts wet cement ink and then 'rock' from a different sentiment in Fresh ink steel blue.  They are both from the fun Studio Calico Snap On set - such great graphics and sentiments:

 Above is a closeup that hopefully lets you see the shine from the mist.
I used some thin  foam dots to mount the front panel to the card base.  A little dimension is always good, right?

So, how is your misting?  Are you a pro or still learning like me?

Supplies:
Paper: Staples 110lb white
Ink: Hero Arts wet cement ink, Fresh Ink steel blue
Stamps: Studio Calico Snap On
Misc: Studio Calico Chevron mask, Studio Calico Mister Huey's: Heirloom Blue and Shine; MS circle cutter,  foam dots