Showing posts with label clean and simple. Show all posts

Saturday, July 27, 2013

Runway Inspired RIC#40: Stella McCartney

This colour combo is so not my usual so I thought it was perfect to challenge myself. 

I pressed some Studio Calico Hearts and Arrows wood veneers into ink - Fresh red currant and mango and since I didn't have a bright enough yellow, used some dollar store pearlescent paint.  I added some Rock Candy Stickles for a little shine.
I made a little mistake on the sentiment - I meant to stamp the U in Hero Arts mid tone wet cement and then layer the rest in Versafine Black Onyx over top but stamped the U in black first so reworked the whole thing a bit.  Oops!  To get the gray part all in one line, I covered some of the words with washi tape before stamping into the ink pad and then removing it to stamp on the card.  This is another way of masking sentiments.  (The sentiment is configured in a stacked row so I had to get creative unless I wanted to cut it apart ...)

Supplies:
Paper: Staples 110lb white
Stamps: PTI Live Love Life
Supplies: Versafine Black Onyx; Fresh red currant, mango; Hero Arts mid tone wet cement
Misc: Studio Calico Hearts and Arrows wood veneers, dollar store yellow paint, Glossy Accents

------

My next card also features Live Love Life from PTI's uber talented Maile Belles:
I stamped the sentiment repeatedly using Hero Arts mid tone wet cement and Versafine Black Onyx before adding the hearts in red currant, mango and harvest Fresh inks.
Supplies:
Paper: Staples 110lb white
Stamps: PTI Live Love Life
Ink: Hero Arts mid tone wet cement, Versafine Black Onyx, Fresh red currant, mango and harvest 

Thanks to RIC for the colour challenge!  Happy hopping to you all!  Oh, and if you are looking for some crafty supplies, check out my sale page here to see if anything catches your eye.  I've got grid journalling cards, an impression plate and some stamps!

CASology cue week 54 - gold

I stumbled upon Week 54 of CASology's challenge - gold.  I have gold mist, gold ink and even gold paint and sequins!  I used a few of these supplies to create some cards using this as my jumping off point.

For my first card, I used some LCI woodgrain cardstock that I misted with Mister Huey's gold mist.  I also added a Heidi Swapp resist chipboard heart that I pressed into my Brilliance Galaxy Gold for some more gold shimmer.
 Here's a closeup of some of the shine - hopefully it comes through in the picture:
Almost one layer, right?!  And no stamps - can you believe it?!!! :-0

Supplies:
Paper: SU Basic Gray, LCI woodgrain
Misc: PTI Wonderful Words hello die, Heidi Swapp mistable heart, Mister Huey's gold mist

-------

For my next card, I grabbed my pack of Studio Calico Speech Bubbles wood veneers (from the Snippets collection) and pressed one of them into my beloved Brilliance Galaxy Gold ink pad.  Love this ink!!


I stamped my nephew's name using Versafine Black Onyx using Lawn Fawn stamps - alpha stamps are great for personalizing cards!

I added some gold heat embossing with Zing powder combined with Versamark and PTI's Irresistible Ikat set.  Very simple but striking patterns in this set.
Since I had the alphabet stamps out and his name all lined up, I changed the first letter to a capital (it wouldn't fit on the speech bubble!) and stamped a wooden tag.  I used a bicycle stamp (Hero Arts Joy Ride) underneath it since he loves scooting so much!  I know he will appreciate it and my sister can use it for her scrapbook.  I'll add some baker's twine to it and a glue dot or three on the back so it's all ready for her.

Tip for stamping on wood - use pigment inks NOT dye inks unless you want the ink to bleed .... ask me how I know!?

Supplies:
Card
Paper: Staples 110lb white
Stamps: Lawn Fawn Claire's ABCs
Ink: Versamark, Versafine Black OnyxBrilliance Galaxy Gold
Misc: Zing embossing powder (gold),  Studio Calico Speech Bubbles wood veneers

Tag - wooden tag (Impress rubber stamps), Lawn Fawn Claire's ABCs, Versafine Black Onyx, Fresh steel blue ink, Hero Arts Joy Ride

----

One more card to go - when I make cards for a challenge or hop, I like to pull a bunch of supplies that might work and then just build up my stash.  Why not, right?

I have seen this technique before with the full alphabet die cut out and then just a few letters highlighted in some way.  Thought I would give it a go with 'hi' and had a piece of gold shimmer card stock already cut out to use the alpha die cuts.
I glued a piece of patterned card stock behind the 'h' and 'i' and then added some Glossy Accents for shine.
I added a ton of  foam dots behind and popped the panel up onto a piece of white card stock which served as my base.  I made the gold card stock basically reach down top and bottom and only had it matted with white on the sides for a bit of a different effect.

Here you can see the shine from the shimmery paper and the Glossy Accents a bit better:
Oh, and I think I have found the trick to Glossy Accents - I used to keep it nozzle down with my bone folder, pens and X-acto knives but now am storing it on its side and it hasn't clogged and the glue is always ready to go.  Tombo Mono Multi I store nozzle down but Glossy Accents seems to prefer lying on its side ... whatever works, right? :-)

Supplies:
Paper: Recollections gold shimmer, Staples 110lb white, scrap red patterned paper
Misc: PTI Outline Alphabet die set, Glossy Accents, foam dots
-------
If you are looking for some crafty supplies, check out my sale page here to see if anything catches your eye.  I've got grid journalling cards, an impression plate and some stamps!


Wednesday, July 24, 2013

Festive Friday 13 - silver, pink and white

Well, the talented ladies over at Festive Friday have created some gorgeous cards with this new colour challenge combo:
Isn't that a pretty combination of colours?  Well, I made some more holiday cards to add to my stash.  Without further ado, here they are:
Well, the talented ladies over at Festive Friday have created some gorgeous cards with this new colour challenge combo:
Isn't that a pretty combination of colours?  Well, I made some more holiday cards to add to my stash.  Without further ado, here they are:
I used Holiday Lights from PTI with some Fresh sugar ink and silver embossing powder.  Ah, the joys of heat embossing - so simple and yet so effective!

Here's a close up of the embossing magic:
For my next one, I inked up Hero Arts Cling Dots with Fresh sugar ink and then layered it with a piece of grid card stock from Papertrey. 
I just got this paper pad and love it!  I have a thing for grids and graph paper so this fits the bill quite perfectly!
For my next one, I used some Blush Zing embossing powder which actually looks a little more pale peach than pink but I went with it!  I used a WMS set that a friend gave me for the ornament and then heat embossed in silver embossing powder for the sentiment from PTI's Bountiful Banners.
Very simple and CAS but perfect to mail since it is nice and flat.  Always good since so many stamps are used for holiday cards already ... plus my digital scale has decided to stop working so I can't weigh my envelopes anymore ... will have to invest in a new one. :-(
My next one uses a set that I just got - PTI's Round Repeats.  I simply love these medallions and they are so easy to stamp and line up!
A closeup of the embossing of the WMS sentiment and the layered medallion - LOVE this!!  I will have to try it with a rainbow colour combo next.
I made a tag to go with the card using aluminum tape and a SSS border die for the edge.  I used From Me To You for the to and from and then one of the sentiments in the WMS set with some sugar on the edges of the tag.

Well, that's it!  Thanks for the inspiration, Meredith and crew!  You girls rock!
-----
Check out my sale page here for some crafty items I have on sale now ... if you need some new supplies, see if any of my items interest you.
-----
Supplies: 


Paper: Staples 110lb white
Stamps: PTI Holiday Lights
Ink: Fresh sugar,  Versamark
 
Paper: Staples 110lb white, PTI patterned paper (sweet blush)
Stamps: PTI Holiday Lights, Hero Arts Cling Dots
Ink: Fresh sugar,  Versamark
Misc: Zing embossing powder (silver)
Paper: Staples 110lb white
Stamps: PTI Bountiful Banners, WMS 2011 Holiday Ornaments
Ink: Versamark
Misc: Zing embossing powder (silver, blush)
 
Card supplies
Paper: Staples 110lb white
Stamps: PTI Round Repeats, WMS 2011 Holiday Ornaments
Ink: Fresh sugar, Versamark
Misc: Zing embossing powder (silver)

Tag supplies
Paper: Staples 110lb white
Stamps: PTI From me to you, WMS 2011 Holiday Ornaments
Ink: Fresh sugar, Versafine Black Onyx
Misc: aluminum tape, SSS hexagon border die, WRMK corner chomper

Tuesday, July 23, 2013

some CAS cards ...

I just got back from San Francisco visiting my sister and her family including my adorable little nephew ... what a wonderful trip!

Here are some cards I made just before I left ...

I was inspired by Kristina Werner and kept them super simple just like hers.  My cards are loosely based on this card of hers.

I must confess that this first one I had to improvise after getting ink on the panel ... I hate that!!  You can still see a bit of the smudging ....

The rest are all basically the same with different sentiments ...
 I kept the colours neutral so the images could shine ...
These are some other CAS ones I also put together.  I got this gorgeous little rubber stamp from a cool store in Vancouver with the image of a camera and I was just itching to use it:
 The stamp handle is really cool - it looks just like a camera itself!!  Here's a close up:
 Isn't it cute?!
 I used Tide Pool ink from Hero Arts' mid tone line:
 A close up:
 And the two cards together:
I kinda like the CAS style of these ... what do you think?  Are CAS cards your style?

-----
Check out my sale page here for some crafty items I have on sale now ... if you need some new supplies, see if any of my items interest you.


Supplies:
Paper: Staples 110lb white
Stamps: PTI Mini Blooms, camera stamp
Ink: Hero Arts mid tone inks red royal, tide pool, cement, cup o' joe; Versafine Black Onyx
Misc: foam dots

Monday, February 11, 2013

Festive Friday #1 - red, white and silver

The fabulous Meredith MacRitchie has begun a blog entitled Festive Friday to help us create holiday cards all through the year.  The challenge is to use red, white and silver.
When I saw this gorgeous colour combo, I puchased some silver embossing powder tout de suite with the idea that I would get some cards made right away ... Well, days later and I still hadn't had a chance to make any cards for this challenge.  I finally had a moment and got inky. 

For my first card, I grabbed some silver shimmer cardstock I purchased a while back with an M's coupon and made a clean and simple card.
Of course, by the time I ever get to take photos, it is dark so you'll have to excuse the bad lighting ... no light box for me!  I used a die cut from PTI's Happy Trails and smooshed it into my Fresh red currant ink pad to get the colour I wanted.
I used Versamark and some white embossing powder to stamp Technique Tuesday's Peace Joy and Love stamp set.  White embossing on silver always has such a cool look ...
Some low profile foam dots on the dove and I mounted the silver panel to a white card base leaving some white space peeking out.

My next card used silver heat embossed leaves (PTI's Mistletoe and Holly) with a white heat embossed sentiment from PTI's Think Big Favorites.
I mounted it on a white card base and added some burgundy and silver Stickles.  Gotta love the bling that Stickles bring! :)
The shine of the silver embossing is so pretty against the Scarlet Jewel cardstock - that embossing really pops on dark cardstock.
I am so sad that the Think Big Favourites series has come to an end - I just love larger more bold sentiments. 

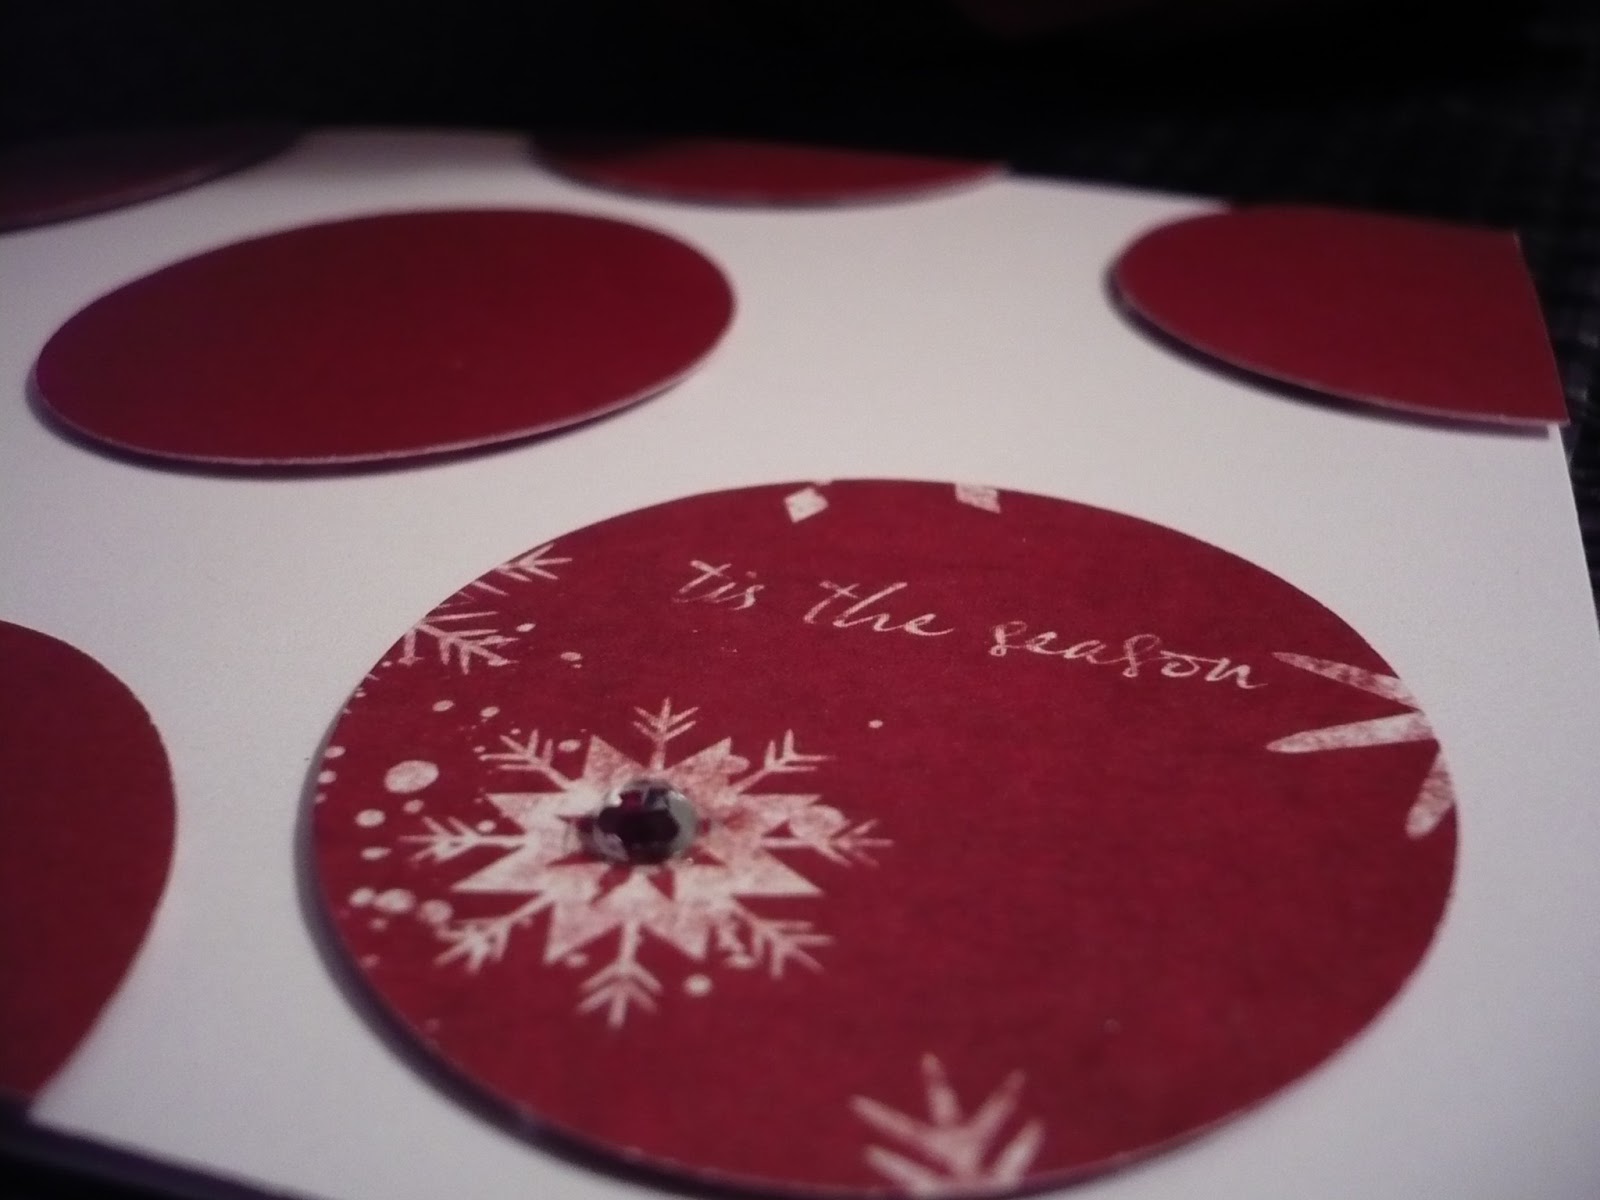
My next card made good use of my 1 3/4" circle punch and some holiday patterned cardstock.  I punched a bunch of circles and mounted them to a white card base.  I used the 'B' side of the cardstock for all but one of the circles and the patterned one (the 'A' side) had the perfect sentiment for the card - 'tis the season. Now that I'm looking at that one circle, I think it could move over a bit more to the right ... oh, well!  Gonna let it go for now and maybe move it a bit tomorrow.
I added a silver rhinestone to the centre of the snowflake on this one for a little bling.  Not sure if you can tell, but all the circles are mounted with low profile foam dots for a little extra dimension.
 
When I was playing with my silver embossing powder and starting out, I made this card and decided to add the red stars ... bad idea on my part but I'll show you the card anyhow ...  I just love that frame from Pretty Peonies ... why did I have to add those stars?!
Well, Meredith, congratulations on your fabulous beginning to your challenge blog - I am so proud of you! <3 br="">

Supplies:

peace on earth
Paper: Staples 110lb white, Recollections silver shimmer
Stamps: Technique Tuesday Peace, Love and Joy
Ink: Versamark, Fresh red currant
Misc: white  Zing embossing powder, foam dots


holiday wishes
Paper: Staples 110lb white, PTI Scarlet Jewel
Stamps: PTI Mistletoe and Holly, Think Big Favorites
Ink: Versamark
Misc: silver and white  Zing embossing powder, Stickles (diamond, burgundy), foam dots


tis the season
Paper: Staples 110lb white, Christmas patterned paper
Misc: 1 3/4 circle punch, silver rhinestone, foam dots