Sunday, January 27, 2013

Passion for Papertrey: Black and white challenge #1

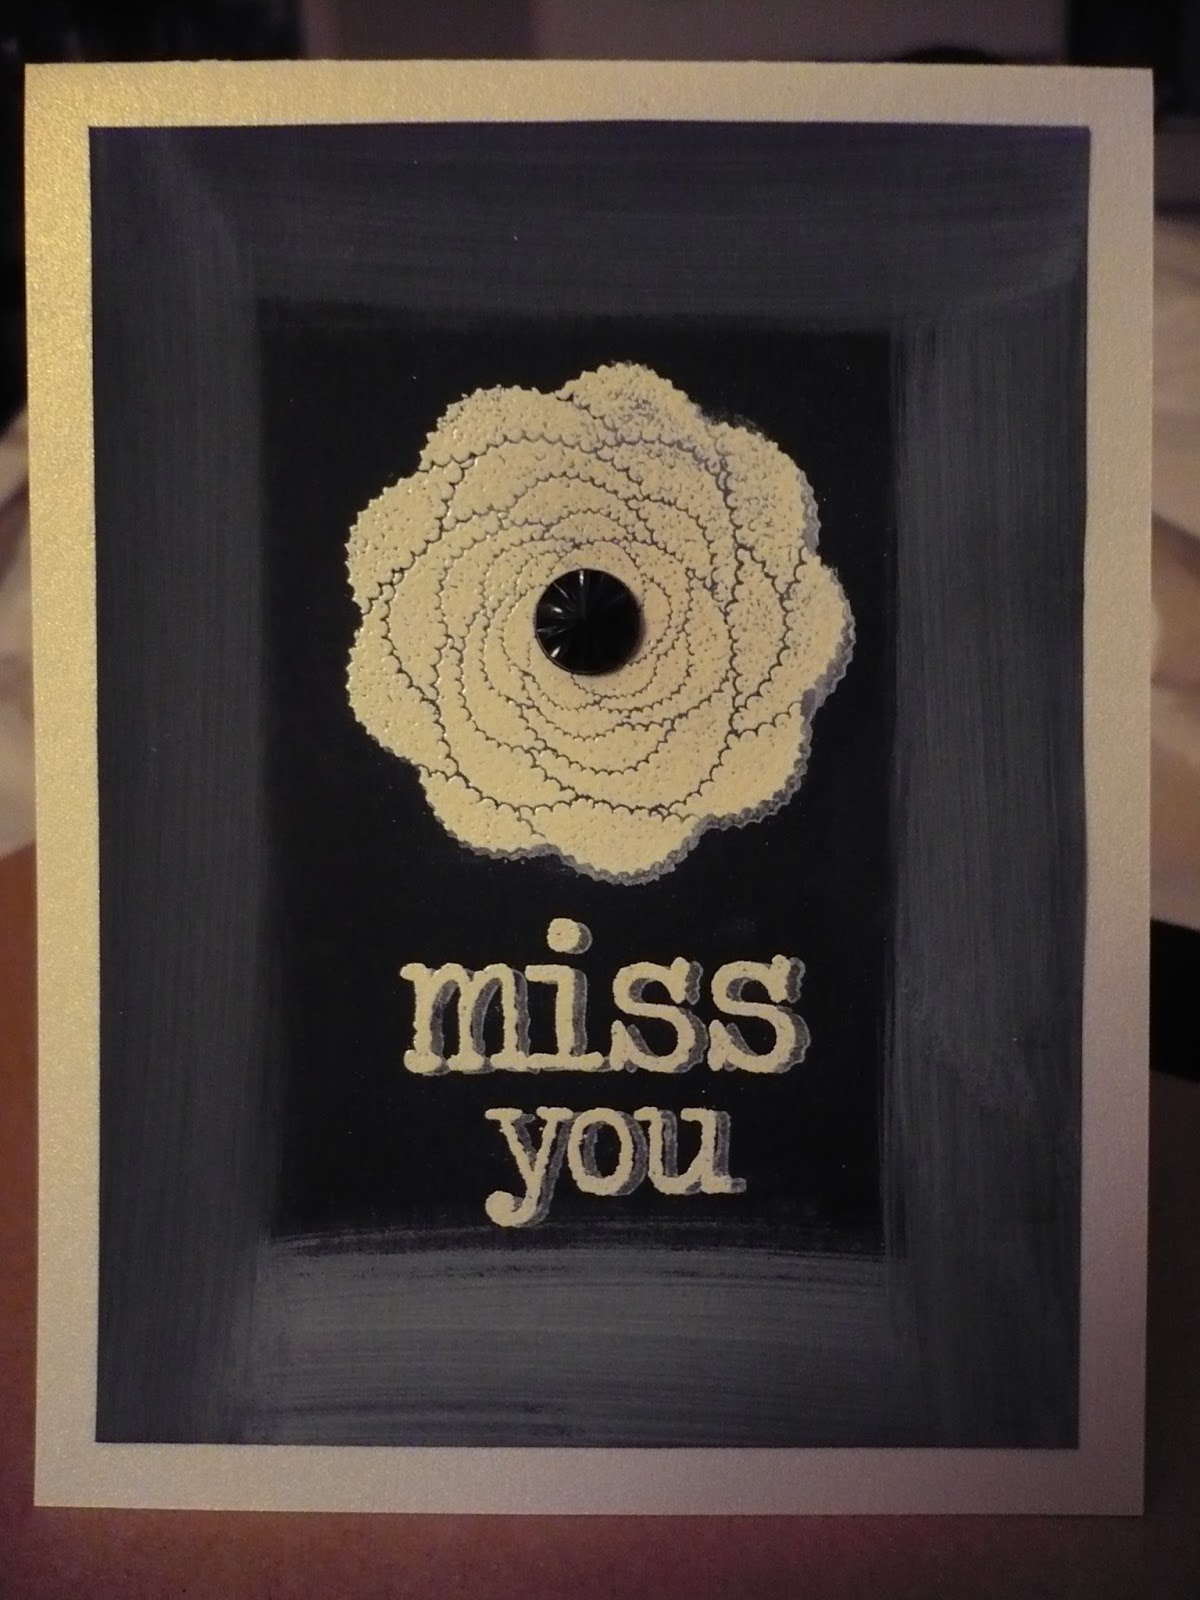
Over at A Passion for Papertrey, the lovely and talented ladies have a new challenge featuring the classic combination of black and white.  I decided to finally try the chalkboard technique and have some fun with it.  I followed Betsy Veldman's tutorial for a Papertrey Make it Monday which was very helpful.  I kept it simpler with less blending for the look I wanted.
 I stamped a Natural Beauties flower and then Wonderful Words' sentiments with Versamark and then embossed with Zing white embossing powder.  Next I stamped the flowers and sentiments over top and slightly off with Colorbox Frost White Ink. 
I took a wet baby wipe with some Frost White Ink and swiped it around the edges.  I had originally tried blending with my fingers but it looked horrible so went with this instead.
I added a Recollections black sparkly embellishment to add a little bling and mounted the card front to a white shimmer piece of cardstock.

This technique was a lot of fun and I will be trying it again soon!  I made one more card while my supplies were out so make sure to take a look at it too. :)

Have you tried this yet?  Show me what you have created in the comments below or in my other post.  I'd love to see some more examples of this ...

Supplies:
Paper: black cardstock, white shimmer cardstock
Stamps: PTI Natural Beauties, Wonderful Words additions
Ink: Versamark, Colorbox Frost White
Misc: Zing white embossing powder; Recollections embellishment

Thursday, January 24, 2013

Ribbon Girl and Moxie Fab Background challenges: Love you more

Over at the Ribbon Girl blog, their challenge is ivory and pink and I have some great pink inks from Fresh.  Their inks have such great coverage on clear stamps so I use them quite regularly.
I made a cream card base, then layered it with a hexagon embossed piece.  This is a great embossing folder that I love to bits!  I have used it with a lot of letter press techniques and it is gorgeous.
I stamped the hexagon pattern from Studio Calico's Oh Snap in Fresh ink using Sugar.  Then I layered a sentiment from the same set with Fuschia ink.
I added some glue and Rock Candy glitter to all the holes of the o's and r's and mouted this layer with foam dots.  I love the texture of that embossing folder with the repetition of the hexagons in the stamping of the background.  Actually, now that I look at that layer, I could enter this in Moxie Fab's creat your own background challenge too! :-)

I am also entering this card in this week's CASE study challenge of adding texture - I think the hexagon embossed layer works for texture, right?  The cards over there by the DT are simply stunning- check them out here: CASE study challenge #125


Supplies:
Paper: Staples 110lb cream
Stamps: Studio Calico's Oh Snap
Ink: Fresh sugar, fuschia
Misc: Craft Concepts hexagon embossing folder, Rock Candy glitter, glue pen

Ribbon Girl challenge - pink and ivory/Moxie Fab window card challenge

Over at the Ribbon Girl blog, their challenge is ivory and pink and Moxie Fab has a window card challenge.  I decided to combine the two and make a hot pink card with some ivory and a window to boot!
I took a piece of Cosmo Cricket's DeLovely paper from a 6 x 6 pad I won from the lovely and talented Aga a while back and used that to cover my cream card base front.  I cut out an Angled Labels die window and then made a frame with two of the dies together.
I added some acetate and stamped the sentiment from Studio Calico's Oh Snap stamp set from  in StazOn Jet Black.  This is the best ink to use on acetate because it doesn't smear.  I am a little OCD about my clear stamps so I quickly used some StazOn stamp cleaner so my stamp is clear again ... I like being able to see through my stamps completely! :)

Next, I stamped the Studio Calico grid pattern background stamp underneath on the inner part of the card using Fresh ink in Sugar.  This adds a little extra interest through the window.

Have you made any window cards lately?  Do you like to add acetate or just leave them open?

Supplies:
Paper: Cosmo Cricket DeLovely 6 x 6 pad, Staples 110lb cream
Stamps: Studio Calico grid pattern background stamp, Studio Calico's Oh Snap
Ink: Fresh Sugar,  StazOn Jet Black, PTI Angled Labels dies, acetate
 

Ribbon Girl challenge and Moxie Fab's Itty Bitty challenge - Sweet Baby

Over at the Ribbon Girl blog, their challenge is ivory and pink.  Not my usual combination but I went for it and had a lot of fun.  I also loved the idea of an itty bitty card and since Moxie Fab is having a challenge for cards of 3 x 3 or smaller, I am entering this in their challenge as well.  Aren't little cards fun to make?  A whole different scale ...
I used a piece of cream card stock for a 3 x 3 card and stamped it with PTI's Postmarks in Fresh sugar ink.  Very subtle but effective.  I added a 1 3/4 circle from Basic Grey's Cappella 6 x 6 pad.  I stamped the sentiment from Mega Mixed Messages with Memento's Espresso Truffle. 
Next, I grabbed my glue pen and added some Rock Candy glitter.  A few  foam dots to pop it up from the base and some corner rounding and that's it!
Have you made any mini cards lately?  Aren't they fun?

Supplies:
Paper: Staples 110lb cream, Basic Grey Cappella 6 x 6 pad
Stamps: PTI Postmarks, Mega Mixed Mesages
Ink: Tuxedo Espresso Truffle, Fresh Sugar
Misc: glue pen, Rock Candy glitter, foam dots, 1 3/4 circle punch


Papertrey January Blog Hop Challenge/Moxie Fab Patterned Paper Challenge

I was inspired by a few challenges out there - Papertrey's Blog Hop to use black or grey cardstock and Moxie Fab's Make Your Own Patterned Paper.  I stamped a bunch of flowers from PTI's Pretty Peonies in Tuxedo Black ink from Memento.  Even though I'm not a Copic girl (gasp! :P), I do know it is a good ink that won't bleed.  Then I went to town using an aqua pen and a bunch of colours with some Shimmer Paints.  I wasn't careful and just had fun with the colours, not paying too much attention ...
I used my heat tool to fully dry the panel and then embossed using the Herringbone impression plate.  This added some great texture.  I mounted this to a light grey card base with foam dots and continued with my sentiment.
I love the look of white ink on dark cardstock and use this a lot.  However, I had a lot of trouble lining up the sentiment straight on the die cut so I ended up stamping and then die cutting, using a negative die cut to perfectly place the die cut.  This works really well and I keep negative die cuts in my cd sleeves along with the dies themselves for this very use.
It's hard to see the shimmer in the picture, but I promise it's there!

Since I went to town with the dry embossing on here to add some texture, I am adding this to the CASE study challenge on texture this week.  Check out the stunning creations by the DT over there: CASE study challenge #125

Supplies:
Paper: PTI Smokey Shadow, Staples white and grey
Stamps: PTI Pretty Peonies, Everyday Button Bits
Ink: Memento Tuxedo Black, Color Box Frost White
Misc: PTI Double Ended Banners dies, Herringbone Impression Plate, Aqua Pen,  Shimmer Paints, foam dots
Make It Monday #101: Layered Embossing - thank you so much

Layered embossing is a lot of fun, as I have recently discovered.  Over at Papertrey Ink, they have a great video explaining this technique:
I set out to do some layered embossing on a Mat Stack 1 die cut.  I used one of the ornate frames from Pretty Peonies and embossed using Zing Brown Sugar embossing powder and some Versamark ink.  I layered this with a sentiment (Think Big) with Versamark and  Zing Aqua embossing powder.
I stamped the Mat Stack outline in Versamark ink and left it as is (no embossing).  I swiped some Vintage Tea dye duo ink to the edges and added it to the card base with foam dots.  The card base was a simple Rustic Cream piece embossed with the Quatrefoil cover plate. 
 When it is used to emboss rather than cut, it adds an almost quilted look:
A fun little card for a thank you is always useful, right?  And those enlarged sentiments are so nice and graphic - I'm going to miss that series.

Oh, and I was recently told about another embossing challenge so I will enter this card there as well.  Check it out here at the fabulous blog  Addicted to CAS- Embossing.

Supplies:
Paper: PTI Rustic Cream, Kraft
Stamps: PTI Mat Stack 1 Collection, Pretty Peonies, Think Big
Ink: Versamark; PTI Vintage tea dye duo
Misc:  Zing embossing powder - aqua, brown sugar; foam dots; PTI Mat Stack 1


Papertrey January Blog Hop Challenge/Make It Monday #101: Layered Embossing - celebrate

For this month's blog hop over at Papertrey Ink, the challenge is to use black or grey cardstock. So I decided to make a card with a dark grey cardstock and to combine it with this week's Make it Monday: Layered Embossing.  Here is Heather's video showing the technique:
For this card, I layered the vase with the sentiment.  I stamped the solid vase with Versamark and embossed with Stampendous garnet embossing powder (a great deep dark red shade).  I then used Versamark for the flowers and embossed with Zing Gold embossing powder.
Lastly I added the Mat Stack 1 sentiment and embossed with Zing White embossing powder.  As long as you don't heat it for too long, it doesn't bleed at all.  What a fun technique, right?   
I used a Smokey Shadow card base and added my light grey layer with some foam dots and a little blingy ribbon.  Since the card is so dark, the sparkly pink ribbon shows up really well and the light grey layer is more prominent.

When I make dark card bases, instead of making an insert I often use a white gel pen to write my message.  It contrasts nicely with the cardstock and is easy to read.  What do you do for dark card bases?


Supplies:
Paper: PTI Smokey Shadow, Staples light grey
Stamps: PTI Gracious Vases, Mat Stack 1 collection
Ink: Versamark
Misc:  Zing embossing powder - white, gold; Stampendous garnet embossing powder, foam dots; pink sparkly ribbon from stash

Papertrey January Blog Hop Challenge/Make It Monday #101: Layered Embossing - thank you

For this month's blog hop over at Papertrey Ink, the challenge is to use black or grey cardstock. I decided to make a card with a dark grey cardstock and to combine it with this week's Make it Monday: Layered Embossing.  Here is Heather's video showing the technique:
And here is my card:
I had a lot of fun with this technique!  I stamped the frame (from Framed) in Versamark and embossed with  Zing Brown Sugar embossing powder.  Next, I stamped the leaf image from Harvest Berries with Versamark and embossed with  Zing Blush embossing powder. 
I layered this with a Versamarked Think Big sentiment and embossed with  Zing Aqua embossing powder.  Each time I did another layer, I swiped a dryer sheet to avoid any static.  This works well and is my own version of an embossing buddy.
I mounted the grey cardstock to a base of kraft using foam dots to add some dimension.

This card has already been mailed out - I needed a simple thank you card and this fit the bill.  Have you tried the technique yet?  I had a lot of fun with layered embossing.  A few botched attempts before I succeeded ... (I tried the crackle background layered with a Pretty Peonies flower and an Everyday Button Bits sentiment but the sentiment started to 'crackle'! :P )

I was recently told about another embossing challenge here so I will enter this card there as well.  Check it out here at the blog Addicted to CAS- Embossing.  There are some amazing entries there and the DT made such beautiful cards! 

Supplies:
Paper: PTI Smokey Shadow, Kraft
Stamps: PTI Framed, Harvest Berries, Think Big sentiments
Ink: Versamark
Misc:  Zing embossing powder - aqua, blush, brown sugar; foam dots

Saturday, January 19, 2013

Make It Monday #100: How to Package Cards with Oversized Embellishments #5

This week over at Papertrey Ink, they are challenging us to create a solution for packaging oversized cards.  Here is the video Dawn McVey made with a few wonderful solutions:
 And another baby card for a colleague:
 I had a leftover piece of swiss dot embossed cardstock and used my 1 3/4 circle punch to cut out some circles.  I then adhered them with foam dots and added buttons and twine.

A Signature #2 sentiment and that was it!
With the buttons, the card is too thick for a regular envelope so an oversized one was the way to go.  I notched out a hole for the twine and baby charm and stamped Modern Wood Mats in wet cement ink.

Supplies:
Paper: Staples 110lb white, PTI Hawaiian Shores
Stamps: Signature Greetings #2
Ink: Hero Arts wet cement, Memento Nautical Blue
Misc: 1 3/4 circle punch, Swiss Dots embossing folder, foam dots, baby charm, baker's twine, button jute twine, buttons and glue dots

Make It Monday #100: How to Package Cards with Oversized Embellishments #4

This week over at Papertrey Ink, they are challenging us to create a solution for packaging oversized cards.  Here is the video Dawn McVey made with a few wonderful solutions:
I had quite a few cards to make so used this challenge to get me motivated.  Here is my next creation:
I had a few baby cards to make for colleagues - I am a part of the Sunshine Fund at work where we give cards (and sometimes gifts) to celebrate life's best moments and help people out during the bad times.  I had two sympathy cards to do last week but this weekend called for some baby cards to make - much more uplifting, right?
Inside I stamped "Sweet Baby" from Mega Mixed Messages but forgot to photograph it - oops!

I embossed the diamond coverplate on Kraft card stock and then added an Enchanted Evening Pretty Peonies label and 'happy' from the same die collection.  Each one was popped up on another layer of foam dots so the card ends up being quite thick.
I used an oversized envelope that I stamped with Modern Wood Mats and then notched a hole and added some twine and a baby charm.

Hope they like the card! :)

Supplies:
Paper: Staples 110lb white, PTI kraft, enchanted evening, spring moss
Ink: Hero Arts wet cement
Misc: PTI Diamond coverplate, Pretty Peonies dies, foam dots, baby charm, baker's twine