Showing posts with label make it monday. Show all posts

Sunday, May 14, 2017

Papertrey Make it #284:background stamping with sentiment stamps

This week's Make it Monday over at Papertrey Ink is all about repeated sentiments.  I went to town stamping a background for a sympathy card and prepping a baby card as well.
I used a Botanical Silhouettes sentiment for the background, repeatedly stamping with Fresh Ink blue sage.  I added a stamped image from my beloved Lovely Layers set using Fresh Ink Blush three times MISTI stamped and then the edges with Peach.  I love being able to do this with the MISTI!

I will save the Welcome Baby card for when I find out if it's a boy or a girl and the name as I love to personalize baby cards ...


Saturday, March 25, 2017

Papertrey Make it Monday: Window Chipboard Sentiments

I had a great time making a birthday card for a friend using this week's Make it Monday video and inspiration.
I used the Feather Finery with Fresh ink silver lavender and blush inks.  I added the 'wishes' sentiment using Versafine Lagoon Blue.
I decided a little somthing more was needed so added a Studio Calico background grid stamp using Fresh provincial gray ink.  I die cut the birthday window and added a kraft chipboard sentiment, stacking the card stock up with five layers.

Congratulations to Stephanie for joining Papertrey and thank you for a wonderful first video! <3 p="">

Sunday, November 13, 2016

Make it Monday #267 : Assembly line crafting

This week's video from the talented Laurie Willison was all about assembly line crafting.
I cut out a bunch of tags using one of the Tinsel and Tag dies in a few colours and some of the banners as well.
 I used my MISTI to stamp four tags and a bunch of banners all at once.  This makes it go so quickly and you can double or triple stamp and even use different colours for an ombre look.
I used my MISTI to stamp four tags and a bunch of banners all at once.  I used a bunch of sets that I had been itching to use from my last order - Holiday Greens and Holiday Fancy Pants plus Tinsel and Tag sentiments.
And I now understand what all the fuss about Delicata Gold ink is!! It really does look divine on cardstock!  I even stamped 12 kraft envelopes using Holiday Swoosh and Holiday Greens with Fresh Ink Fuschia and Delicata gold.  They are all ready for their labels and stamps!

When I address the tags, I will choose the banner I want to match - I have already put foam adhesive on the back of all of them and am planning to make some chalkboard tags with the black tags I cut.

So how are your holiday creations coming along?  Started yet?  Almost done?
----
In case you are looking for some stamps or dies, I have some on sale:

Papertrey Stamps and dies:
Background Basics: Vines – stamp set ($30 from the vault) --> $15 lowered to $12
Background Basics: Geometrics ($30 from the vault) --> $15 lowered to $12
Embellishments Coordinating dies ($8) --> $4
Stitches and Swirls - stamp set ($48 from the vault) --> $24
Christmas Pointsettia dies ($8) > $5
Damask Designs stamp set ($48 from the vault) > $24
Background Basics: Wrought Iron[/b] ($36 from the valut) > $24
Everyday Button Bits - images only - stamps $10

From other companies:
Hero Arts – Friends $5 SOLD
Tim Holtz - Flights of Fancy $8
Altenew Wild Hibiscus brand new $15 missing top left stamp 

Shipping available to Canada, US and International based on weight:
One sheet (Canada $1, US $2, International $3.50)
Two sheets (Canada $1.50, US $3, International $6)
Payment via Paypal.
All sets have minimal staining, if any, come with labels and are from a smoke free, pet free home. :)

Friday, June 3, 2016

Make it Monday #251: Gradient Watercolouring with Die Cuts - Sending Hugs

This week's Make it Monday over at Papertrey Ink is all about gradient watercolouring on die cuts.  Dawn did a great video illustrating this with her Ziggies:
So I grabbed my my Zig water brush pens.  (I bought the 24 pen set which is just the right amount of colours.)  I used some  Strathmore heavy weight watercolour paper and used my pens to add colour and then added some water with my Kuretake aqua pen.  (This one is my favourite.) 
I grabbed my Hexagon Cover plate and cut the watercoloured piece.  I then added some Tombo Mono Aqua glue to the back of the hexagons and carefully pushed them down on to my Recollections 110lb white card base.
I cut out a Make it Market Don't Forget to Write die cut using Smokey Shadow and sandwiched four cuts together to make it more substantial.  A little more Tombo Mono Aqua glue and some Wink of Stella clear glitter brush pen on the die cut and that was almost it.
Can you see some of the shine above?  If not, enlarge the picture by clicking on it.
I added a stamped 'hugs' from Make it Market Don't Forget to Write with some of my faithful Versafine Black Onyx ink and my MISTI stamping tool.
I had a lot of fun with this technique so thank you to Dawn for inspiring us all!

Check out my stamp sale list here:

Friday, May 27, 2016

Make it Monday #250 - masked backgrounds: hello

This week's Make it Monday over at Papertrey featured the lovely Laurie and masked backgrounds. I had fun creating a masked background using a wide washi tape and some Fresh and Avery Elle inks.
Unfortunately I removed some of the paper when I pulled off the washi tape which is why the border had to be cut down ... sacrifices were made!
I chanelled Laurie's scoring technique for the kraft card base and used a limited edition set (Iconic Images) and white ink for the bird.
I added a Smokey Shadow hello die cut stacked up with three layers and added it to the masked background.
I applied a liberal amount of Wink of Stella clear and then loaded up on Glossy Accents.
The cool thing about this is it makes the shine and sparkle of the Wink of Stella even more pronounced.  Hard to capture on camera, but I promise, it's there! :) 

(Click any of the images to enlarge and get a better idea of what I'm talking about!!)

Check out my stamp sale list here:

Monday, June 29, 2015

PTI Make it Monday #216 - Hello there

This week, over on Nichole's blog the uber talented Laura Bassen is showing how to dress up cover plates.
I had a great time mixing Perfect Pearls with inks and painting away on a water colour piece of paper die cut with the Circles cover plate.
I added a piece of water colour paper in behind with some splashes of colour and impressed it with the In Bloom impression plate.  I love the look this gives peeking out!
I then used a Scripted die to cut some Enchanted Evening card stock - a nice colour combination with the pinks and the navy.
 You can see the Perfect Pearl pearlescent sheen a bit better here:
The inks were a combination of Avery Elle and Fresh inks blended with Pefect Pearl pearlescent poweder and water.

If you have a moment, check out my crafty sale of items including a brand new ombre ink pad:
http://cardsbycara.blogspot.ca/2014/11/some-items-for-sale.html

Monday, March 30, 2015

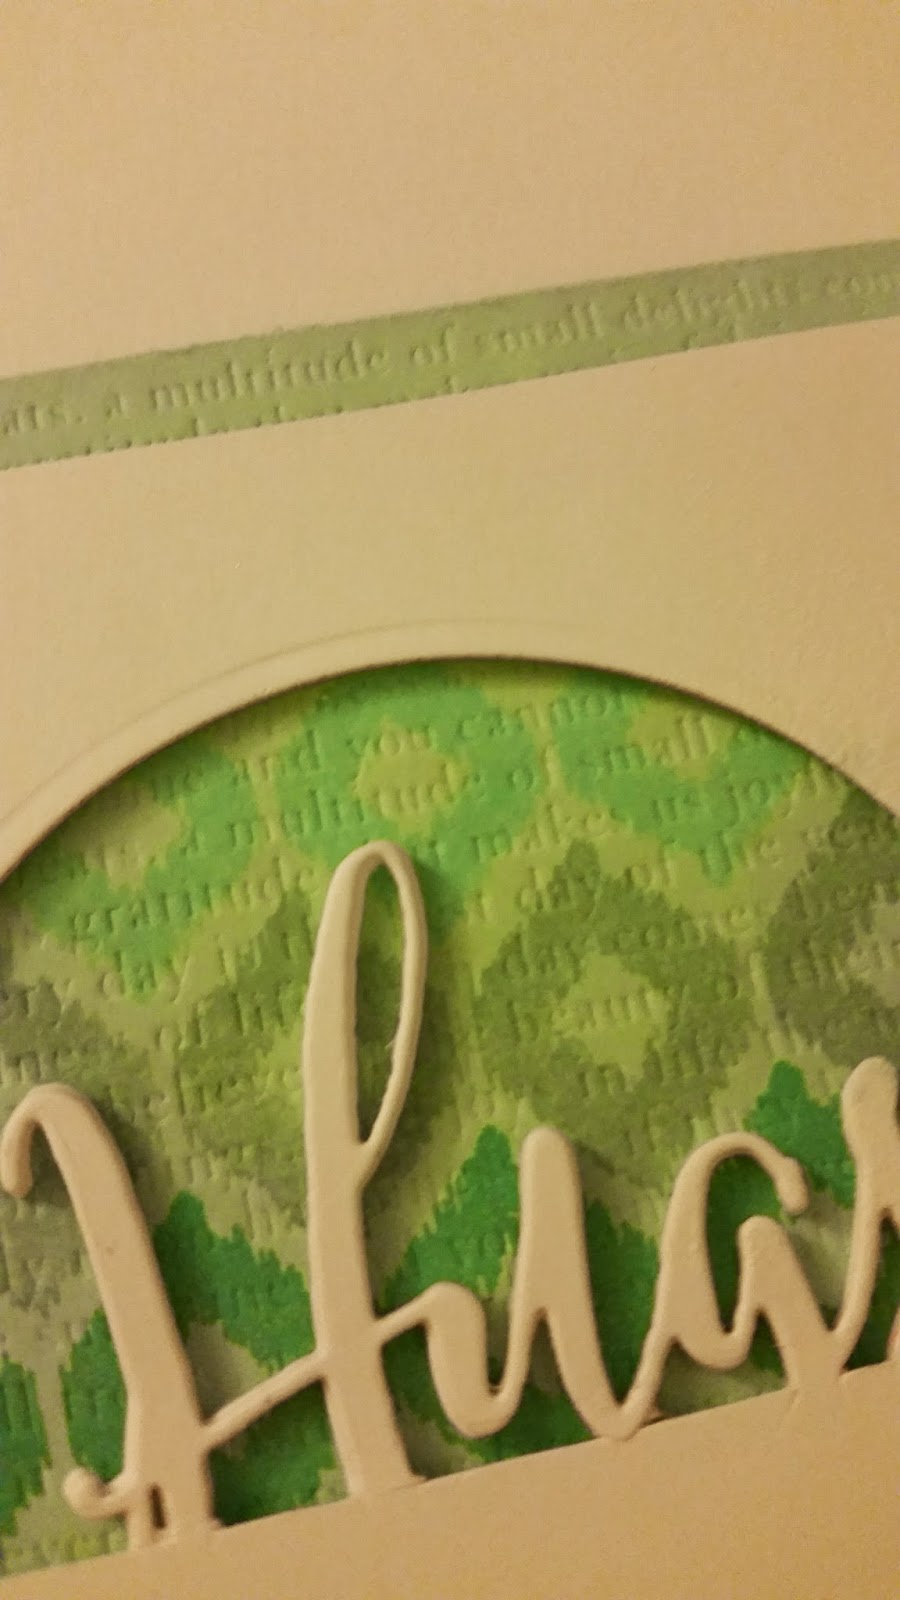
PTI Make it Monday #207: Double Partial Die Cutting

The phenomenal Laura Bassen shows us how to do double partial die cutting and I haven't done this awesome technique for a while.  My first try had some slightly over zealous cutting and I cut too far with one of the Wet Paint dies since I couldn't see ... next time I will try with a negative piece to position it better ...
I took a cursive Hugs die and a circle die and did the partial die cutting on a Recollections 110lb white card front.  I also die cut four more Hugs die cuts to pop it up and add some dimension combined with foam tape.
I stamped progressively darker colours using the Irresistible Ikat set and then added some Text Impressions dry embossing with one of the PTI impression plates - love those to add a little extra somethin' somethin' ... :)
 Here you can see some of the texture and die cutting up close:
Inside I used the ampersand from Bountiful Banners and the Easter wishes stamp from Mega Mixed Messages - so many useful sentiments in that jam packed set!
Hope you have fun with this week's challenge!!

Check out my sale of crafty items - stamps, an ink pad and some other assorted items!! Oh, and I bought two of the Hero Arts ombre ink pads (mint to green), so if anyone is interested in buying one still sealed, just leave your email and info in a comment!!


Sunday, March 29, 2015

PTI Make it Monday #206: Mixing Stamped Patterns

Danielle Flanders did such an amazing job on this week's Make it Monday mixing her gorgeous creations ... I had a great time stamping my patterns but then got stuck trying to put them together to make some cards.  I am not enamoured with them all but will still share ...

I took my colours from some pictures from Rifle Paper Co. - I just love their modern whimsical designs!
I did some swatches to see how they look together:
 And here are my designs using all PTI products - Irresistible Ikat, Ombre Builder, Watercolour Wonder, Leave it Be and Swoosh.
My first card is quite ethereal and hard to photograph with pale subtle colours.  I used a Feather Finery die with the Leave it Be, layered some foam tape using the Ikat polka strip and a Wet Paint III die cut with a portion of the Ombre builder.
 I rounded the corners with a Corner Chomper and that's about it!  A very simple pale pastel card.
My next card is not my fave but I will show you anyhow .... I used a Wet Paint III die on a bunch of different patterns that I had stamped:
 Five patterns are included here with various scales ... some worked better with this die than others. :)
This next one only uses two patterns but I like the layout of it.  I took a Kraft card base and laid a Watercolour Wonder striped piece over, matting and centring it.  I then used a circle die to cut out the centre.
I stacked four die cut layers of Recollections 110lb white card stock with the top being an Ombre Builders pattern from one of the sheets I stamped.
My last card also only uses two patterns but I thought I would share it anyhow:
I used an Aqua Mist card base, the Leave it Be background layered with a DCWV black chalkboard scrap and the Swoosh pattern.
Thank you to Danielle for challenging me to try a bunch of different patterns ... it was a lot of fun even though I found this to be rather difficult ... Nevertheless, I tried my best.


Sunday, February 22, 2015

Papertrey Make it Monday - Cover plate stencils and embossing paste

This week's Make it Monday is all about using a cover plate as a stencil for embossing paste.  I love this technique!  The talented Laurie showed us her beautiful creation with transluscent embossing paste and although I have that, I decided to use pearlescent instead.  It has a gorgeous shimmer to it that I just love ...
I used a heart cover plate and washi taped off one row to use with the Dreamweaver pearlescent embossing paste.  I laid it on thick and then smoothed it out as much as possible.  I removed the stencil and let the paste dry.  I actually wrote some report cards while waiting ... might as well make use of my time! :)  Deadlines and all!
I added a sentiment from Luxe Letterpress using Fresh steel blue ink and some Mini Blooms in mint ink at the top and bottom.
I added some Wink of Stella clear on the flowers, cut down the white card panel (Recollections 110lb white) and added it to a PTI kraft base.  Easy peasy!

Sunday, January 11, 2015

PTI Make it Monday #196 - Colourful Corners - Just a Note

I had a card that I forgot to photograph this week for the Make it Monday corner stamping challenge - hopefully it makes it in before the deadline.  I used the stamps from Bold Bouquet in Fresh Ink mint and steel blue.  Restamping makes the colours really pop and it's easy to do with the MISTI.
 I added a sentiment from one of my Fillable Frames sets in Versafine Onyx Black.
I really love the colour combo - calm and serene.  I made four of these - one for me and three more for card sets I have an order for.  Simple and easy to mail!

PTI Make it Monday #196 - Colourful Corners: just a note

One more creation for the corner stamping challenge over at Papertrey Ink:
I used a couple of Studio Calico Colour Theory inks for the dandelion starbursts from Botanical Silhouettes and a sentiment from the same set in Déjà Blue.  Simple and one layered!

Saturday, January 10, 2015

PTI Make it Monday #196 - Colourful Corners: Thank You

 I made some simple cards for some card sets I have orders for - stamping some simple images in the corners for this week's Make it Monday over at Papertrey Ink.
I took card bases of 110lb white Recollections card stock and added a Botanical Silhouettes sentiment using Fresh ink in navy.  I then added some Leave it Be images in Fresh blue sage.
I smudged one of them by mistake but decided to hide that by stamping a graph background from Studio Calico.  Like magic, you can't see it! :)