Friday, January 31, 2014

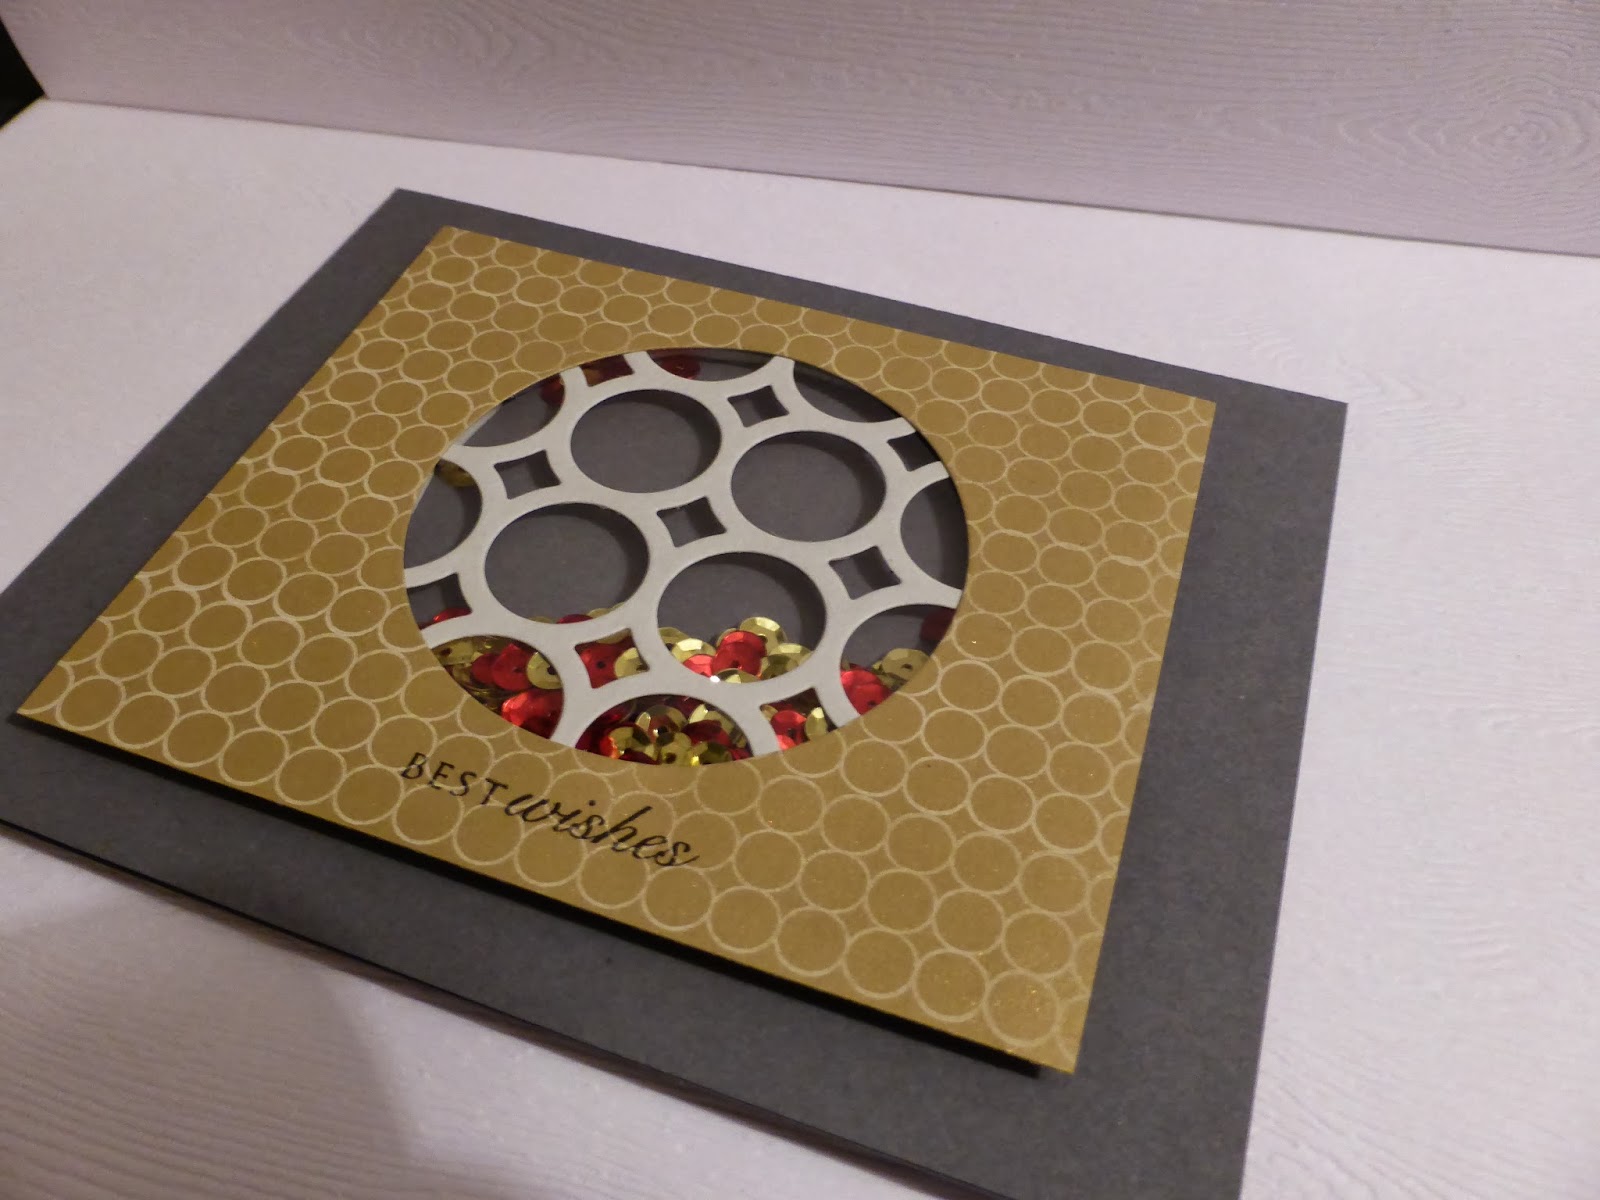
PTI Make It Monday #150: Window Screen Cards - best wishes

Here is another card inspired by this week's Papertrey Make it Monday -I just love shaker cards so I thought I would try one of those combined with the window screen using a cover plate.
(See the video above for the helpful video by the talented Melissa.)


I cut a card panel using gold shimmer card stock (Recollections) and stamped it with PTI's BB: Circles using Vintage Cream ink.  I layered this with a Round and Round (PTI anniversary set) sentiment  StazOn Jet Black ink.
I used a grey (Staples) circles cover plate die cut with some acetate to make a window and added gold and red sequins.  I used lots of foam dots to pop it up off the card base (SU Basic Grey).
I just love interactive cards so this shaker card fits the bill!  If you have sequins, glitter or even wood veneer shapes, you can throw those in and get started with one of these.  Have you made any shaker cards lately?  

Monday, January 27, 2014

PTI Make It Monday #150: Window Screen Cards - baby

This week over at Papertrey, the talented Melissa shows us how to make window screen cards.  Love using my cover plates in a different way.  You can take a look at another card where I used it as a whole front - very delicate looking:
Anyway, back to this week's MIM ...  I decided to make a baby card that I needed to do for a colleague.  Here's what I came up with:
I started with a white card base and cut a Sweet Blush cover plate with the Hexagon Cover Plate.  I layered a light grey (Staples) card front with some Mini Blooms stamped in Fresh ink (red currant, fuschia, tuscan olive).
I decided the circle needed a frame so I added a Recollections silver shimmer frame and then a Raspberry Fizz 'baby' die cut from PTI's word dies.  I cut some thin slivers of foam tape and coloured it with a reddish pink Distress marker to blend it in a bit more.  I decided to add some Wink of Stella clear glitter - very subtle but love the way it looks!
Here's a better shot of the shimmery die cut - have you tried these pens?  They rock!!  I bought silver and gold too but I use the clear the most.
Are you playing along this week?  Any creations so far?

-----
Check out my crafty sale if you like:
http://cardsbycara.blogspot.ca/2013/06/crafty-sale.html

Saturday, January 25, 2014

PTI January Blog Hop - Pretty in pink!

Blog-hop-logo

This month, Papertrey has challenged us to use pink in our creations for the blog hop:
The-Challenge
Now, I don't tend to use a lot of pink but I do have the supplies for pink creations so I went to town using fuschias, pinks and deeper reds ...
I used the Chevron Cover plate as a stencil and sponged a variety of Fresh ink colours onto some LCI woodgrain cardstock.  I then added a vellum layer for the name 'Salel' for a colleague's new baby with some glitter alpha stickers.
 I tied some silver twine to the top and added a baby charm on the inside (click for a larger image).

This nex card was a simple one with some Pink Paislee chipboard shapes that I sponged with pink ink (Brilliance pearlescent pink) and Fresh ink slate ink.  I added a sentiment from PTI's Lovely Layers with Versafine Onyx Black.
 The card base is Recollections metallic silver - pink and silver always look so good together! :)
I used my Envelope Punch Board to make a patterned paper envelope which you can see just peeking out from underneath the card.

My next card is a simple light gray and pink one with some texture and dimension:
I used the In Bloom impression plate on a piece of pink card stock and used the 'hello' die for a negative die cut.  I kept the little pieces from the 'e' and 'o' and popped up the pink panel using foam dots.  The card base is a light gray card stock from Staples.
I picked up some Kate Spade tape from Indigo and thought it would look good with the gray and pink combo.  I added it to the edges on the top and bottom before stamping an ombre effect using three colours.
 Here you can see the light pink a little bit better:
I kept it one layer so it would be easy to mail even though I usually like to add more layers or dimension ... I even stopped myself from adding sequins - what do you think, should I add some after the fact?

Okay, last card on this pink-athon ....
A very simple one with Fresh ink fuschia stamped Stitches and Swirls from PTI.  I added a vellum sentiment using Fresh slate ink with an Embroidered Blooms 'thanks so much'.
I added some baby pink pearlescent Stickles in the centre of some of the flowers for a little something extra.

Hope you had fun using pink on your creations today!

Check out my crafty sale if you like:
http://cardsbycara.blogspot.ca/2013/06/crafty-sale.html


Monday, January 13, 2014

An engagement card plus some thank you ones ...

A colleague of mine just got engaged so I made a simple card for her:
I used Wplus9's feather set with Versafine Smokey Gray ink and added the Mat Stack 4 Collection sentiment in Onyx Black.
I decided the panel needed a little more texture so I used the Canvas impression plate for some interest.  I love how it makes it almost look like fabric.

Here's the inside:
I have some thank you cards for students all ready to be written in - I used some patterned paper that I got for Christmas and added an MFT Eiffel tower die cut in black and City Scene sentiments in Versafine Onyx Black.
 Super simple but oh so useful for me! :-)
Check out my sale of some craft supplies (stamps, impression plates etc) here:
http://cardsbycara.blogspot.ca/2013/06/crafty-sale.html
Supplies:
Wishing you happiness
Paper: Staples 110lb white, PTI Aqua Mist
Stamps: WPlus9 Feathers, Mat Stack 2 Collection, City Scene sentiments (heart)
Ink: Versafine  Onyx Black, Smokey Gray; Jenni Bowlin chilli powder
Misc: foam dots, PTI Canvas impression plate

Merci beaucoup cards
Paper: Staples 110lb white, various patterned papers
Stamps: PTI City Scene sentiments
Ink: Versafine  Onyx Black
Misc: MFT Eiffel Tower die

Sunday, January 12, 2014

Experimenting with embossing paste

For the longest time I didn't have any embossing paste and was just using gesso which gave a bit of a different finish.  With some help from a crafty friend, I managed to hunt some down in the city and did some experimenting.  I made my own stencil using one of the feather dies from Wplus9.  Here's what I came up with:
My first one was a little too thick but I still added some Stickles Rock Candy glitter anyhow.  I used one of the Irrestible Ikat (PTI) sentiments with Smokey Gray Versafine.
 You can see the sparkly glitter a bit better here in the photo above.
Here are some others I made with a thinner layer of embossing paste:

 And all the cards together as a little set:
What have you done lately with embossing paste?  Have you given it a try?
----
Check out my sale of some craft supplies (stamps, impression plates etc) here:
http://cardsbycara.blogspot.ca/2013/06/crafty-sale.html
----
Supplies:
Paper: Staples 110lb white
Stamps: PTI Irresistible Ikat
Ink: Versafine Smokey Gray
Misc: embossing paste from art store, WPlus9 feather die, Ranger Rock Candy Stickles dry glitter