Saturday, August 31, 2013

Baby shaker card

My little niece was born last week and her name was announced yesterday - Clarissa Elyse.  Isn't that gorgeous?  I wanted to make a card to welcome her into the world so decided to make a shaker card.  I punched some hearts using Lawn Fawn and Studio Calico patterned papers and added some iridescent sequins and sparkly vanilla ones. 
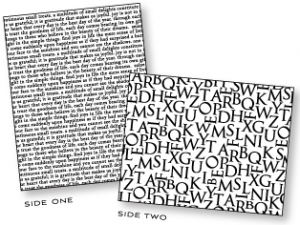
I cut a die cut using PTI's Fabulous Frames and heat embossed it with Versamark and  Zing embossing powder using the Hero Arts Alphabet pattern cling stamp.  The banner is PTI's Bountiful Banners and I used a Lawn Fawn alphabet stamp for her name.

While I had her name on the clear block, I stamped it on a few spare die cuts I already had - a Fillable Frames from PTI and a Kraft tag from Michaels.
Supplies:
Paper: LCI woodgrain, PTI Hawaiian Shores, Lawn Fawn and Studio Calico patterned paper
Stamps: Hero Arts Alphabet pattern cling stamp, Lawn Fawn alpha
Ink:  Versamark, Memento Nautical Blue
Misc: Zing embossing powder, PTI Bountiful Banners die, PTI Fabulous Frames die, heart punch, sequins 

Thursday, August 29, 2013

Enjoy your day

I created a card for a fellow crafter and since she wanted to know how it was done, I will share the process.  I took a piece of black card stock and cut it using my Big Kick and this full card triangle die:
I adhered it to a white card base using Tombo Mono Multi glue which has a thin tip and works well for this sort of application.  I stamped the sentiment and feathers using Hero Arts Tide Pool ink and VersaMagic Aquatic Splash before impressing it with one of my favourite impression plates to add texture - the Papertrey Book Print impression plate:

If you click on the picture below to enlarge it, you can see the texture it adds:
I used an exacto knife to cut out one row to make space for the sentiment.

Thanks for the interest in how to make it! :-) Hope that answers any questions you might have ...

Supplies:
Paper: Staples 110lb white, Papertrey Black
Ink: Hero Arts mid tone Tide Pool, VersaMagic Aquatic Splash 
Stamps: Studio Calico Love This
Misc: Papertrey Book Print impression plate, Simon Says Stamp full card triangle die, Tombo Mono Multi glue

The tags are Project Life grid cards using the same stamp set above and Papertrey's To You From Me set.  I have some of the journalling cards for sale here as well as stamps and an impression plate:
 my sale page here


Sunday, August 25, 2013

SAF2013: A sprinkle of salt


I had seen this technique on a video done by Kristina Werner a while back but didn't have a chance to try it. I watched the tips from Nichole's blog and gave it a go today using Inktense watercolour pencils, an aqua pen and salt.
 This was really fun to do and getting the paper washed with colour and salt made me feel very crafty indeed! :0
My salted watercolour sheet was just begging to be die cut so I cut out some butterflies from the Happy Trails die collection and added silver twine and a sentiment.
I thought it needed something in the top left corner so I added some Live Love Life arrows but in hindsight, that wasn't a good idea ... oh, well ... :-(

Did you try this technique?  What did you think?
-------
If you are looking for some crafty supplies, check out my sale page here to see if anything catches your eye.  I've got grid journaling cards, an impression plate and some stamps!

SAF2013: Custom Accents from the Oven

I picked up some shrink plastic after seeing all the wonderful creations yesterday and decided to try the technique out.  Note to self - using Wonderful Words die cuts is not always a good idea, at least for a newbie as it didn't quite straighten out and when I tried to shape it, I broke off the first letter.  Ooops!  Also, in keeping with the tradition of trying to straighten out shapes, the little Polaroid frame from Fabulous Frames is a tad wonky too ... oh, well!
My first one was Damask Snowflakes stamped with Brilliance Galaxy Gold  (BB: Text Styles) and then  StazOn Jet Black  using a Think Big sentiment.  This will look great on a tag or card ....

And here are my others that were not so successful ...
Yup, slightly wonky!  But maybe you can learn from my mistakes and foibles?

SAF2013: Scent-sational cards


SAF2013 had a great inspirational post that I loved!! The idea of scratch and sniff cards is so cool and I mixed some clear embossing powder with cinnamon to make a card to accompany a holiday treat.
I took a Rustic Cream card base and stamped the Mistletoe and Holly background in Fresh Pear ink.  I layered a Versamark inked Think Big background on Kraft Cardstock and then the Holiday Treats text block using Fresh Tuscan Olive.  I used my homemade scented embossing powder on the little gingerbread man - the scent is awesome!! :-)

SAF2013: Sugar Dipped Embellishments + Gallon: Quart: Pint challenge


I tried the sugar coated challenge over Papertrey's Stamp-a-Faire using some Prisma glitter - what fun!

I used Dawn's sugar dipped idea with Glossy Accents:
I used a piece of Authentique's Seasons: summer patterned paper for the background and then a yellow piece from the same pad for the Rosie Posie flower that I dipped in glitter.
I added the sentiment from Botanical Silhouettes in Navy ink (on Rosie Posie too).  The Ocean Tides die cut is from Fabulous Frames - love that set!!  I thought this could also be added to the Gallon:Quart:Pint challenge at SAF2013:
Gallon = Ocean Tides, Quart: Harvest Gold, Pint: Enchanted Evening (Fresh Navy ink)
My next card used Danielle's idea of strips of Sook Wang (scor tape) with glitter over top.  I used the Wonderful Words: Birthday die and added a Mega Medallions 'wishes' sentiment double stamped in Fresh Mango.  Super simple card on a woodgrain card base.
Love the glittery goodness! :)

-------
If you are looking for some crafty supplies, check out my sale page here to see if anything catches your eye.  I've got grid journaling cards, an impression plate and some stamps!  


PTI August Blog Hop + SAF2013: homemade mists

I combined Papertrey's Blog Hop inspiration colours and sketch with the homemade mists from Stamp-A-Faire 2013.  I made a pale purple mist using Fresh Silver Lilac ink combined with water and Perfect Pearls in Pearl.  The resuts were a shimmery lavender mist. 
+
So here's my card using all the elements:
I used the Circles cover plate as a mask and misted a white piece of card stock.  This was a lot of fun - I am definitely going to be making some more mists!! 

I then cut out a circle and added some Mini Blooms and leaves stamped with Versafine Black Onyx.  I added the Botanical Silhouettes sentiment using Navy ink from Fresh as my Enchanted Evening.
 Here's a close up with the misted layer - in person it has a gorgeous sheen to it.
The shot above also shows all the foam dots I used to pop up the circle and then the flowers and leaves.  Lots of dimension for this card.
-------
If you are looking for some crafty supplies, check out my sale page here to see if anything catches your eye.  I've got grid journaling cards, an impression plate and some stamps!  

Supplies:
Paper: Staples 110lb white, Hawaiian Shores, Enchanted Evening, Plum Pudding, Royal Velvet, Simply Chartreuse
Ink: Versafine Black Onyx, Fresh Navy
Stamps: PTI Botanical Silhouettes, Mini Blooms
Misc: Perfect Pearls in Pearl, water, Fresh Silver Lilac reinker, foam dots

SAF 2013: Limited Ingredients Challenge


I had fun with the Limited Supplies Challenge over at Papertrey's Stamp-A-Faire!  Here was my take on it:
 Not sure if you can tell, but there are glittered stripes behind the negative die cut ...

Saturday, August 24, 2013

SAF 2013: Rolled Dough Designs

I picked up some Delight Paper Clay after going out for dinner last night to try today's technique using this product.  It is fast drying and super light which makes it perfect for cards.  I was going to use my Damask Snowflake die to make an ornament but went in a totally different direction.
I used the lower case alpha dies to die cut an 'x' for my nephew, Xavier.  I stamped it with the herringbone pattern from the Mat Stack collection 
I added it to a Mat Stack stamped die cut using Fresh Turquoise ink and an Enchanted Evening mat.  I put on some foam dots adhered behind before adhering it to a Staples grey card stock base that I impressed with the Herringbone impression plate.  Love the texture that adds!         
I stamped an envelope with some trucks and cards from a baby boy Fiskars set - he just adores any mode of transport whether it be trains, trucks, vans .... you name it, he loves it! :-)     

My next card up is a birthday card using some more paper clay.  For this one, I die cut a Notched Flower which I stamped with the BB: Newsprint stamps in French Lavender Fresh ink.
I matted a piece of PTI patterned paper (a purple graph background) to my Staples grey card base and added a Double Ended Banner die cut in Smokey Shadow.
I added a Wonderful Words: Birthday die cut using cork and stamped a coordinating envelope with Modern Wood Mats - such a stylish set!!

I also made a card for my cousin - she loves pastel colours so I went with a muted hues:
I used a piece of Studio Calico's Snippets 6x6 paper pad - love those polka dots!  I adhered that to my card base and then added some silver twine and a woodgrain embossed Beautiful Blooms II die cut in Aqua Mist.  I added my ubiquitous foam dots to the die cut before adding the Postmarks stamped 'k' to the front.
So what have you created with paper clay?  Share your links and tips below! :)

-------
If you are looking for some crafty supplies, check out my sale page here to see if anything catches your eye.  I've got grid journaling cards, an impression plate and some stamps! 
------
Supplies:
'x' is for Xavier
Paper: PTI Enchanted Evening, Staples grey
Ink: Fresh Sky Blue, Turquoise
Stamps: PTI Mat Stack collection
Misc: Delight paper clay; PTI Herringbone impression plate, lower case alpha die, mat stack and layerz, foam dots

birthday
Paper: Staples grey, PTI patterned graph paper

Ink: Fresh French Lavender
Stamps: PTI BB: Newsprint
Misc: Delight paper clay, cork; PTI notched flower die, PTI double ended banner die, PTI Wonderful Words: birthday die; foam dots

'k' is not for cousin
Paper: PTI Aqua Mist, Studio Calico Snippets 6x6 paper pad
Ink: Fresh Fuschia
Stamps: PTI BB: Postmarks
Misc: Delight paper clay; PTI Woodgrain impression plate, lower case alpha die, foam dots, silver twine

SAF 2013: Tea Staining Techniques


I decided to try my hand at tea staining techniques over at Papertrey's Stamp-a-Faire festivities.  I took some sticky back canvas and got rid of the stickiness by using a powder embossing tool.  I used some strong Earl Grey tea to stain the canvas and loved the colour they turned out to be - quite dark, actually!
 
Since I am impatient, I heat dried them part of the way but they had a chance to stain while I was out for coffee with a friend this morning.  :)
 My first card uses Rustic Cream card stock as a base stamped with the Studio Calico grid pattern background stamp in Fresh Birch ink.  I added the dress form and stamped over with the BB: Music Background set using Vintage Cream ink.  Very subtle but I think you can see it in the picture above.
 I added a sentiment using Fresh ink Chocolate from Happy Trails - just love that font combo!
The inside uses PTI's Love Birds sentiment and hearts stamped with Fresh chocolate and Fuschia inks.

My second card uses the Lovely Layers dies - I also stamped them with Lovely Layers and BB: Geometric in Vintage Cream and Fresh Chocolate inks.  The centre circle used Natural Beauties star burst.
I did some simple scoring for a border around the whole card and did not use any sentiment on this one.  I always like to have some all purpose cards that I can leave without a message or stamp right before sending them.  I tend to always use sentiments - these days at least - so I really had to hold myself back from doing that! :)
 You can see the scored border up above a bit better ....
And there's a shot of the sticky back canvas from Ranger - great product and I got it on sale!!  Although the original price does seem a bit crazy, doesn't it?  $12 for that package??!!

So, have you tried this technique yet?  What did you think?
-------
If you are looking for some crafty supplies, check out my sale page here to see if anything catches your eye.  I've got grid journaling cards, an impression plate and some stamps! 

Supplies:
To love and be loved
Paper: PTI Rustic Cream
Ink: Fresh Fuschia, Chocolate, Birch; PTI Vintage Cream
Stamps: Studio Calico grid pattern background stamp; PTI BB: Sheet Music, Love Birds, Happy Trails
Misc: Ranger sticky back canvas, powder embossing tool, Tombo Mono Multi glue

Paper: PTI Dark Chocolate
Ink: Fresh Fuschia, Chocolate, Birch; PTI Vintage Cream
Stamps: PTI Lovely Layers, BB Geometrics, Natural Beauties (for inner circle)
Misc: Ranger sticky back canvas, powder embossing tool, MS scoring board, Tombo Mono Multi glue

SAF 2013: Stamp-a-faire Opening Ceremony and Breakfast Bake & Take

Stamp-a-Faire 2013 has begun over at Papertrey Ink and I began this morning's Bake and take using a colour combination as inspiration.  Even though it is 3 hours earlier on the West Coast, I woke up at 5AM and blearily watched a few of the fabulous videos.

I decided to get started using some of the inspiration from the first post - complete with pictures, colours, sketches etc.  I am trying this colour combination first because it's completely out of the box for me - I rarely use orange and this combo is kind of retro and different.  Thought I would give it a go! :)
For my first card, I cut out triangles by hand and made them into a banner.  I stamped them with Memento Tuxedo Black ink using BB: Newsprint for a little added interest.  I used my faithful  Tombo Mono Multi glue to add some button twine - this glue rocks!  It dries clear and is perfect for this kind of job.  You just need to press it for a minute and it adheres cleanly.
I then used  foam dots and popped them up on a piece of LCI woodgrain cardstock.  I die cut a circle using the shape from Sketched Shapes and made a window using some acetate.  I stamped the sentiment using StazOn Jet Black  from Sketched Shapes - I am always in need of birthday cards and have quite a few coming up this fall.
What do you think of the window?  Oh don't you just love this woodgrain cardstock?  It is such a fun choice for a card base.  
My next card uses the same combo with cardstock strips of different widths on an angle.  I then added the sentiment using Fresh Ocean Tides ink in Steel Blue - the perfect colour for Ocean Tides.  I used Staples grey cardstock which works well as a dupe for PTI's Stone.
Not sure I like the placement of the sentiment but ah well ... I'll keep it for now! :)
Happy creating during SAF, everyone!! And thank you to the DT team for all their hard work on today's festivities.  I am heading out for coffee with a friend but will be back later with some more cards and projects. :-)

edited to add - a little bashful now as I just realized you are supposed to COMBINE a sketch AND colour combo ... oops! :(
-------
If you are looking for some crafty supplies, check out my sale page here to see if anything catches your eye.  I've got grid journaling cards, an impression plate and some stamps!

Supplies:
Happy Birthday
Paper: woodgrain white, Staples grey; PTI canyon clay, ocean tides, smokey shadow, autumn rose
Ink: StazOn Jet Black
Stamps: PTI Sketched Shapes (sentiment), BB: Newsprint
Misc: PTI Sketched Shapes (circle die), acetate,  Tombo Mono Multi glue, PTI button twine,  foam dots

Thanks so much 
Paper: Staples grey; PTI canyon clay, smokey shadow, autumn rose
Ink: Fresh ink steel blue
Stamps: PTI Mini Blooms (sentiment)
Misc:  Tombo Mono Multi glue